The world of 3D animation, video games, and visual effects relies heavily on the ability to make digital characters move realistically and expressively. Behind every captivating animated character is a complex, unseen structure known as a rig. Therefore, understanding the character rigging process is fundamental for anyone involved in 3D production. This process transforms a static 3D model into a digital puppet that animators can bring to life.
What is character rigging?
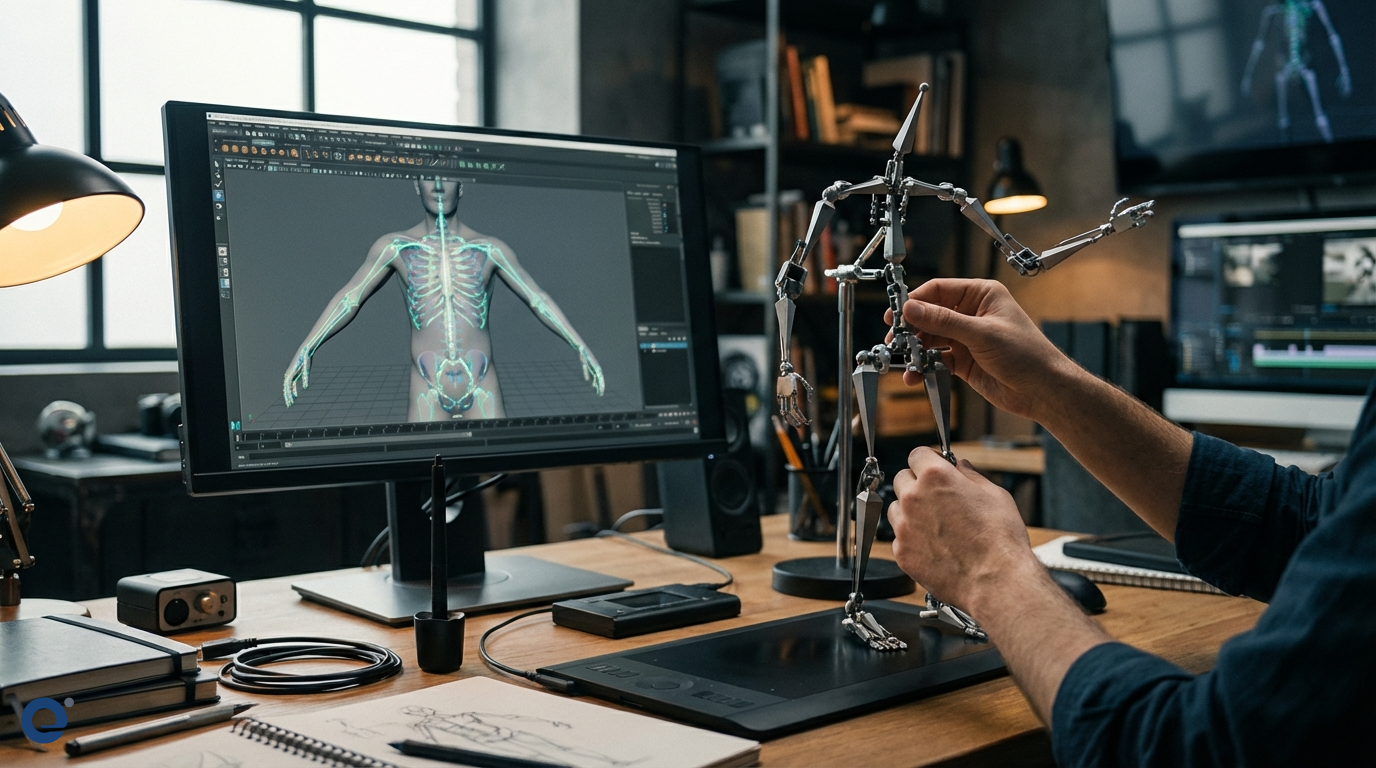
Character rigging is the process of creating a digital skeletal structure (the "skeleton" or "rig") inside a 3D model and defining how the model's surface (the "skin" or "mesh") deforms and moves with that skeleton. It also involves creating a system of controls that allow animators to manipulate the skeleton and, consequently, the character, in an intuitive way. Essentially, rigging gives a 3D model the ability to move, articulate, and emote.
The importance of rigging
Without rigging, 3D characters would remain static statues. It is the bridge between a beautifully sculpted model and a character capable of running, jumping, talking, and conveying emotion. A well-executed rig is crucial for efficient animation workflows and the final quality of the animation. Consequently, it's a vital stage in the production pipeline of films, games, and other 3D media.
The foundations: Rig, model, and goals
Before diving into the process, let's understand the core components. A rig[1] is the internal framework and control system. The model is the 3D mesh created by modelers. The goal is to connect them so the model deforms naturally when the rig is manipulated.
The link between modeling and rigging
Modeling and rigging are deeply intertwined. The topology (the flow of polygons) of the 3D model significantly impacts how well it deforms during rigging. Clean, well-structured topology, especially around joints like elbows, knees, and the face, is essential for good deformation. Therefore, collaboration between modelers and riggers is often necessary.
Goals of a good rig
A successful rig should be:
Animator-friendly: Controls should be intuitive and easy for animators to use.
Efficient: The rig should perform well within the software, not slowing down the animation process.
Versatile: It should allow the character to perform all required actions and expressions.
Stable: The rig should be robust and predictable, without breaking or causing unexpected issues.
Deform well: The character's mesh should deform realistically and aesthetically when posed.
The character rigging process: A step-by-step guide
The rigging process can be broken down into several key phases, each requiring meticulous attention to detail.
Phase 1: Preparation and planning
This initial phase is crucial for a smooth rigging process.
Understanding the character: Riggers need to analyze the character's design, personality, and the range of movements it will need to perform. Is it a realistic human, a cartoon animal, or a fantastical creature?
Gathering references: Anatomical references for humans or animals, or real-world examples of movement, are invaluable.
Model preparation: The 3D model is checked for any issues like non-manifold geometry or intersecting faces. The topology is reviewed, especially around areas that will deform significantly.
Planning the rig structure: The rigger plans the placement of joints, the types of controls needed, and the deformation strategy. This might involve discussions with the animation team.
Phase 2: Skeleton creation
The skeleton is the foundation of the rig.
Building the joint hierarchy: Joints are created and positioned within the 3D model to represent the character's bones and pivot points. They are arranged in a hierarchical structure, with parent-child relationships, mimicking a real skeleton. For instance, the upper arm joint is the parent of the forearm joint.
Naming conventions: A consistent naming convention for all joints and rig components is vital for organization and scripting.
Joint orientation: Each joint has a local orientation (its own X, Y, Z axes). Proper orientation is critical for predictable rotation and the functioning of systems like IK.
Creating control objects: These are usually simple curves or shapes that are visually distinct from the model and skeleton. They are placed around the character to provide intuitive manipulation points for the animator.
Connecting controls to joints: Controls are linked to the joints using constraints or direct connections. This means that when an animator moves or rotates a control, the corresponding joint(s) follow.
Forward Kinematics (FK) and Inverse Kinematics (IK):
Forward Kinematics (FK)[4]: In an FK system, rotating a parent joint also rotates its children. Animating an arm in FK involves rotating the shoulder, then the elbow, then the wrist sequentially.
Inverse Kinematics (IK)[5]: An IK system allows the animator to position the end of a chain (like the wrist or ankle), and the software calculates the rotations of the joints in between (elbow and shoulder). This is very useful for actions like a character's hand staying on a surface or feet staying planted on the ground. Many rigging artists compare tools based on their IK systems.
FK/IK switching: Most limb rigs include a system to switch between FK and IK, giving animators flexibility.
Advanced controls: Depending on the character, riggers add controls for stretchy limbs, foot roll attributes (to easily create walking motions), hand controls with finger attributes, and more.
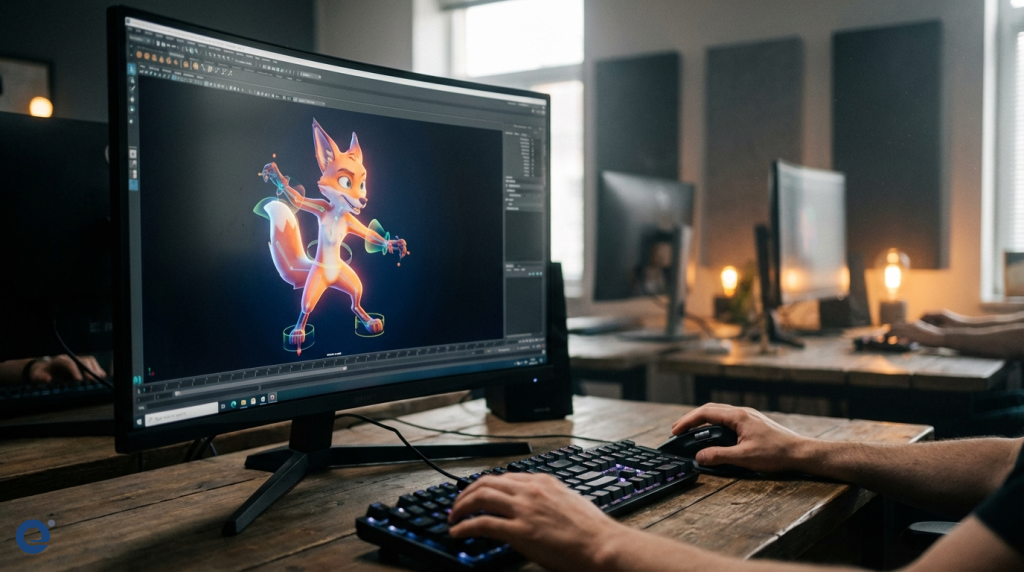
Facial rigging: This is often one of the most complex parts. It can involve a combination of joints for the jaw and eyes, and blendshapes (also called morph targets) for more subtle expressions like smiles, frowns, and brow movements. A system of controls is then built to drive these. Crafting believable facial expressions is a key skill.
A well-rigged character allows for a wide range of expressive poses, bringing the digital creation to life.
Phase 4: Deformation (Skinning)
Skinning[3] is the process of attaching the 3D model's mesh to the skeleton so it deforms when the skeleton is posed.
Binding the mesh: The character's mesh is bound to the skeleton. Initially, the software assigns influence from nearby joints to the vertices of the mesh automatically.
Weight painting: The automatic weighting is rarely perfect. Riggers then manually adjust the influence of each joint on the surrounding vertices using a process called weight painting. This is a time-consuming but crucial step to achieve smooth and natural-looking deformations, especially around areas like the shoulders, hips, and elbows.
Techniques for smooth deformation: Various techniques and tools within the software help achieve better deformations, such as smoothing algorithms and influence editing tools.
Corrective shapes/blendshapes: For areas that are very difficult to deform correctly with weighting alone (like extreme bends at the elbow or knee, or muscle bulging), riggers create corrective blendshapes that activate based on joint angles to refine the shape.
Muscle systems: For highly realistic characters, riggers might implement muscle systems that simulate the bulging and jiggling of muscles beneath the skin.
To add more life and realism, some elements can be automated.
Implementing dynamic elements: Hair, cloth, or accessories like capes or jewelry can be set up with dynamics so they react realistically to the character's movement and forces like gravity and wind.
Constraints: Various constraints can be used to limit movement, make one object follow another, or maintain specific relationships between parts of the rig.
Phase 6: Testing and refinement
A rig is never perfect on the first try.
Testing the rig: The rigger, and often animators, will test the rig by putting the character through a range of motions and extreme poses to identify any problems with controls or deformation.
Gathering feedback: Animators provide feedback on the rig's usability and performance.
Debugging and optimizing: The rigger fixes any issues found during testing and optimizes the rig to ensure it runs efficiently in the animation software.
Finalizing and integration: Once the rig is approved, it is finalized and integrated into the production pipeline for the animators to use.
The Rigging Artist and Technical Director
The role of a Rigging Artist or Rigging Technical Director (TD) is both technical and artistic. They need a strong understanding of anatomy, kinematics, and deformation, as well as proficiency in 3D software and often scripting (like Python or MEL in Maya).
Skills required
A good rigger possesses:
Technical proficiency with rigging tools in software like Maya, Blender, or 3ds Max.
Knowledge of anatomy and biomechanics.
Problem-solving skills to overcome deformation and control challenges.
Scripting abilities to automate tasks and create custom tools.
Good communication skills for collaborating with modelers and animators.
Modelers: To ensure the model's topology is suitable for rigging.
Animators: To understand their needs and get feedback on the rig's usability.
Pipeline TDs: To ensure the rig integrates smoothly into the studio's workflow.
Tools and software
Several industry-standard software packages are used for rigging:
Autodesk Maya: Widely considered the industry standard for character rigging and animation in film and VFX.
Blender: A free and open-source 3D suite with powerful rigging tools that are gaining popularity.
Autodesk 3ds Max: Also popular, especially in the game development industry.
Houdini: Known for its procedural nature, Houdini is also used for complex rigging tasks, especially involving effects.
Many studios also use proprietary tools, plugins, and scripts to enhance their rigging pipelines.
Challenges in character rigging
Rigging is not without its difficulties:
Complex characters: Creatures with many limbs, wings, or unusual anatomy pose significant challenges.
Performance optimization: Highly complex rigs can slow down software, so optimization is crucial.
Realistic vs. stylized: Achieving the desired level of realism or stylization in movement and deformation requires different approaches.
Facial rigging: Creating a rig that allows for a full range of believable facial expressions is always demanding.
The future of rigging
The field of rigging is constantly evolving:
AI and automation: Machine learning and AI are being explored to automate parts of the rigging process, such as weight painting or even skeleton generation.
Real-time rigging: With the rise of game engines and real-time rendering, rigs need to be increasingly efficient for real-time applications.
More intuitive tools: Software developers are continually working on more user-friendly and powerful rigging tools.
Conclusion
The character rigging process is a meticulous and vital stage in bringing 3D characters to life. It combines technical skill with an understanding of movement and anatomy to transform a static model into a dynamic and expressive digital performer. From planning and skeleton creation to control setup, skinning, and testing, each step is crucial for delivering a high-quality rig that empowers animators to create compelling performances. As technology advances, the tools and techniques will evolve, but the fundamental goal of rigging—to enable movement—will remain central to 3D animation and related industries.
More Information
Rig: In 3D animation, a rig is the digital skeletal structure and control system created within a 3D model, allowing it to be posed and animated. It acts like the bones and muscles of a digital puppet.
Controls: These are user-friendly objects (like curves or shapes) in a 3D scene that animators manipulate to pose and move a character's rig, instead of directly selecting and rotating joints.
Skinning: Also known as weight painting or binding, skinning is the process of attaching the 3D model's surface (skin) to the underlying skeleton (rig) and defining how much influence each joint has on the surrounding vertices for deformation.
Forward Kinematics (FK): A method of animating a hierarchical chain of joints where rotating a parent joint affects all its child joints down the chain. Animation is done by rotating each joint individually from the root outwards.
Inverse Kinematics (IK): A method where you position the end effector of a joint chain (e.g., the hand or foot), and the software calculates the rotations of the joints in between to reach that position. It's useful for planting feet or hands.